
From the alpine pastures above Ugine, a hybrid hike plus via ferrata climb to Mont Charvin (2409 m). 1073 m of elevation gain, 11.7 km, cables in place from July to October, exceptional Mont Blanc panorama. Harness and lanyards mandatory for the cabled section.
Today I was in the Aravis, the perfect chance to revisit this hike-ferrata I had done three years ago, which had left me an excellent memory. This unusual route had struck me with its balance between difficult hiking and cabled passages, halfway between traditional via ferrata and alpine ascent.
We step a bit outside the usual scope of my site, we’re here closer to a via ferrata than a classic hike. Some passages require the appropriate gear (harness, lanyards, helmet) and a solid mastery of safety techniques. Don’t be fooled by the absence of extreme difficulties: a slip could have serious consequences.
Approach, Savoyard atmosphere
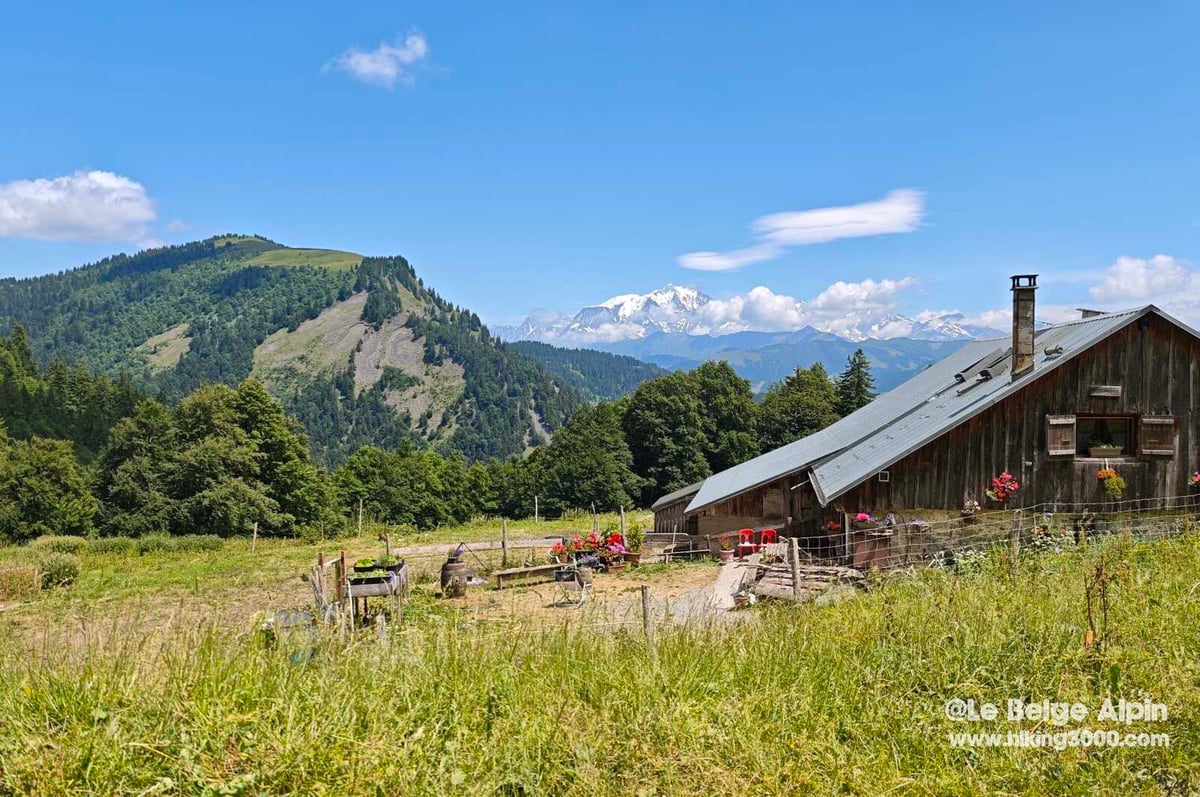
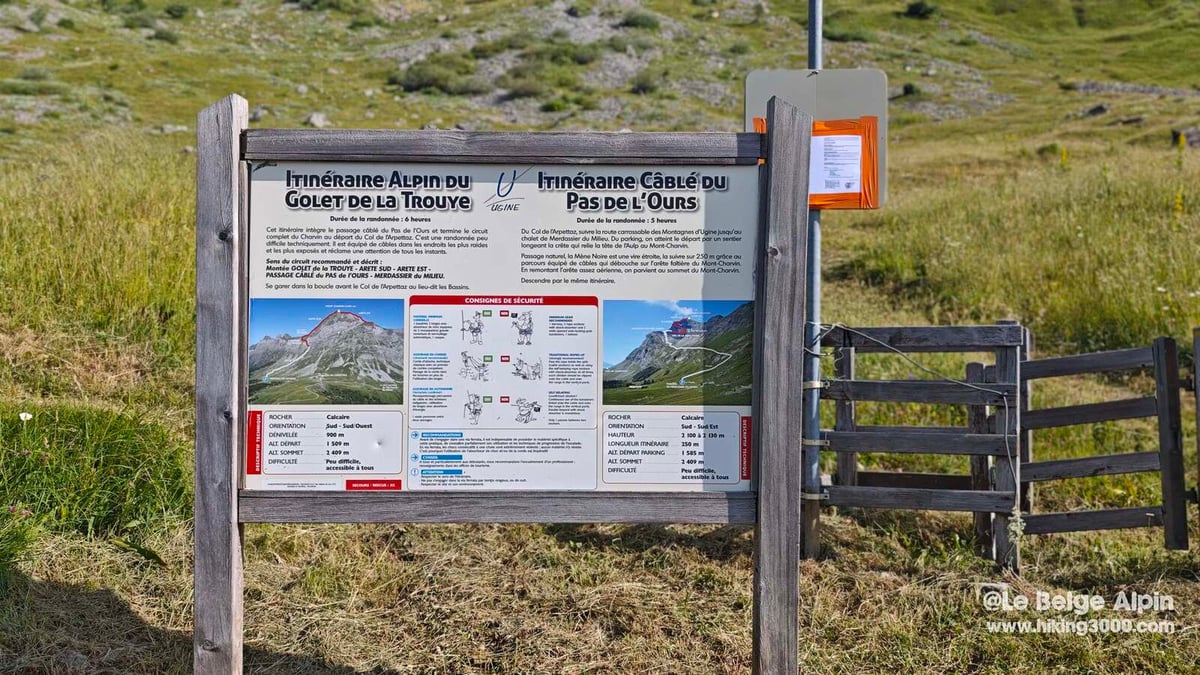
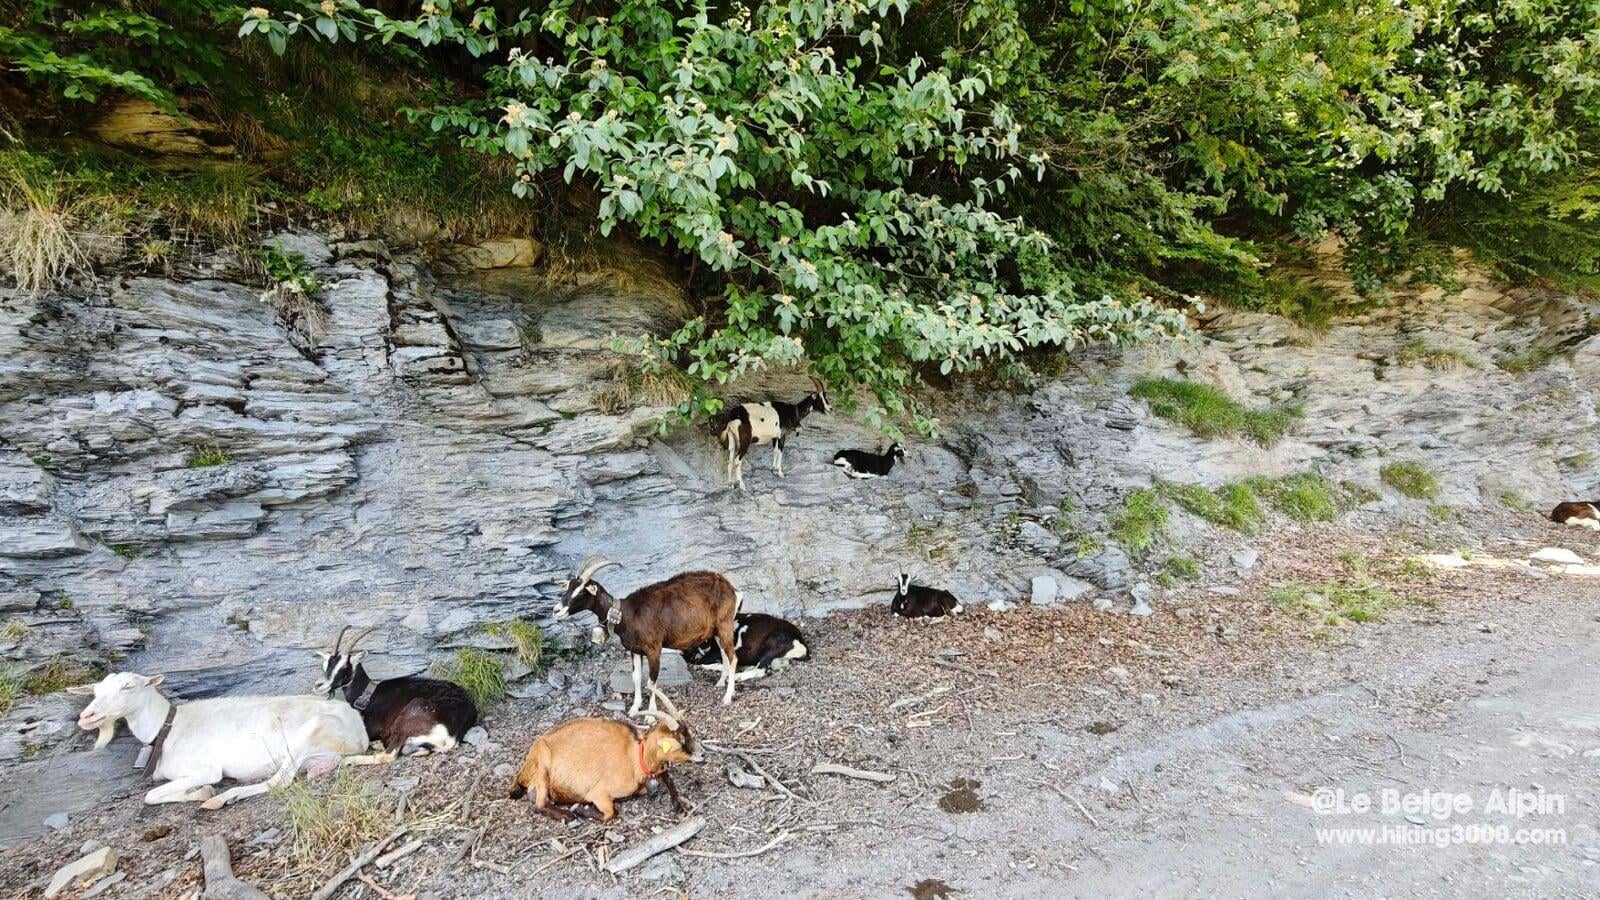
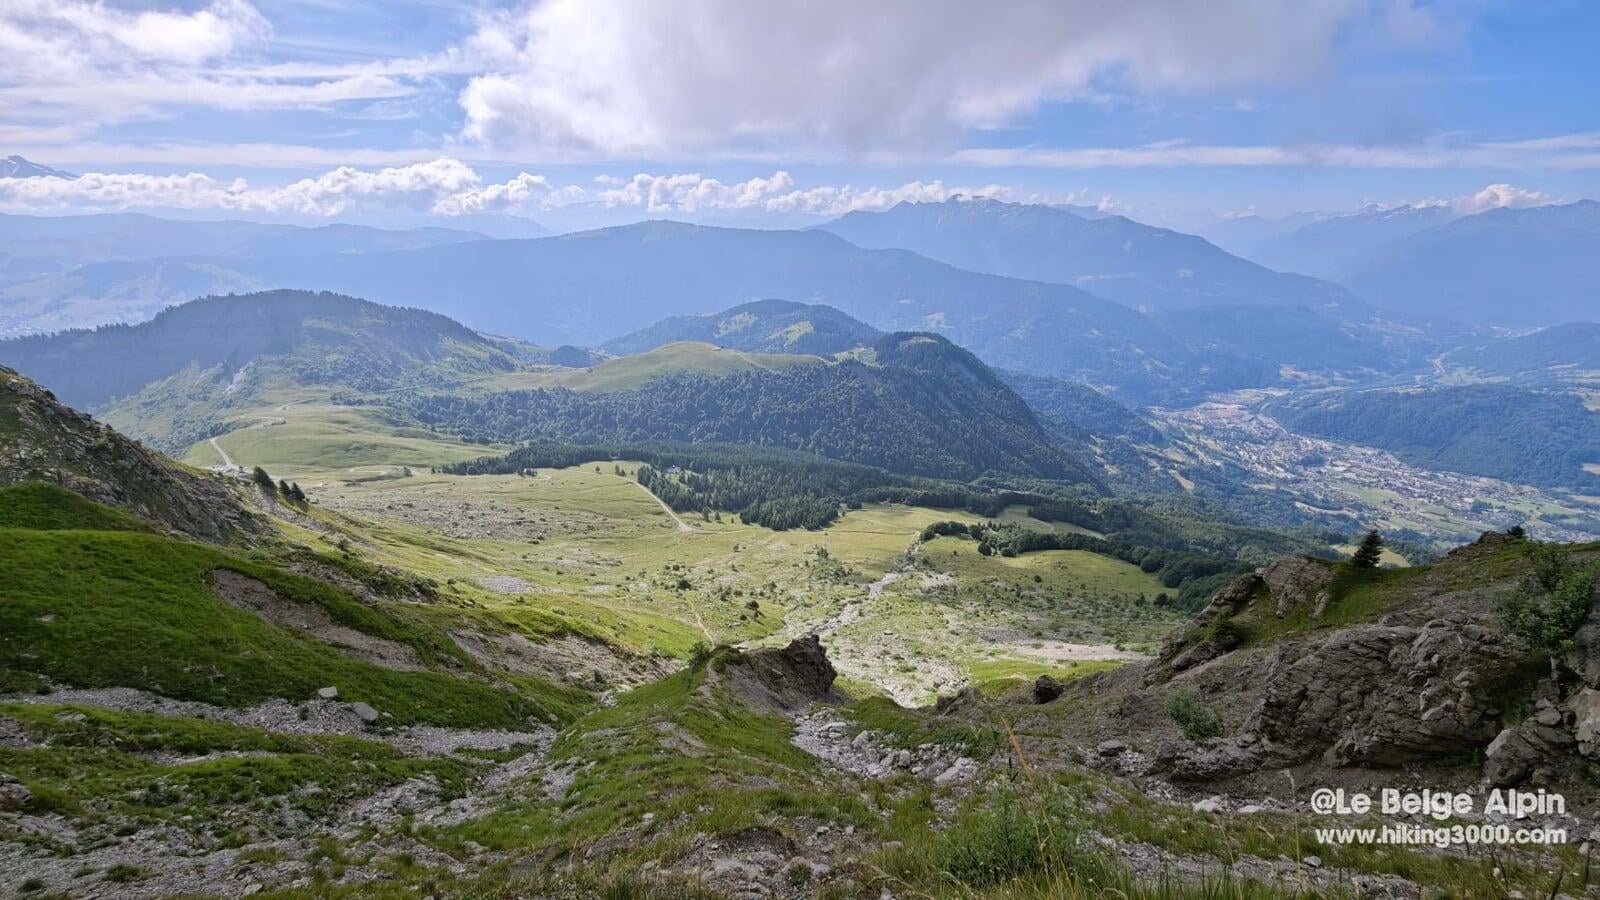
The start is from the parking lot at the foot of the massif, in a pastoral setting of alpine meadows. Savoyard chalets, working farms, goats on the paths, you’re immediately in the atmosphere. At the foot of the massif, an info panel presents the two routes: the Golet de la Trouye (alpine, no cables) and the Pas de l’Ours (cabled, more technical). I go for the cabled version.
After a short approach walk, we tackle the first slopes. Quickly, things get serious. On goes the harness, lanyards adjusted, and we enter the cabled section.
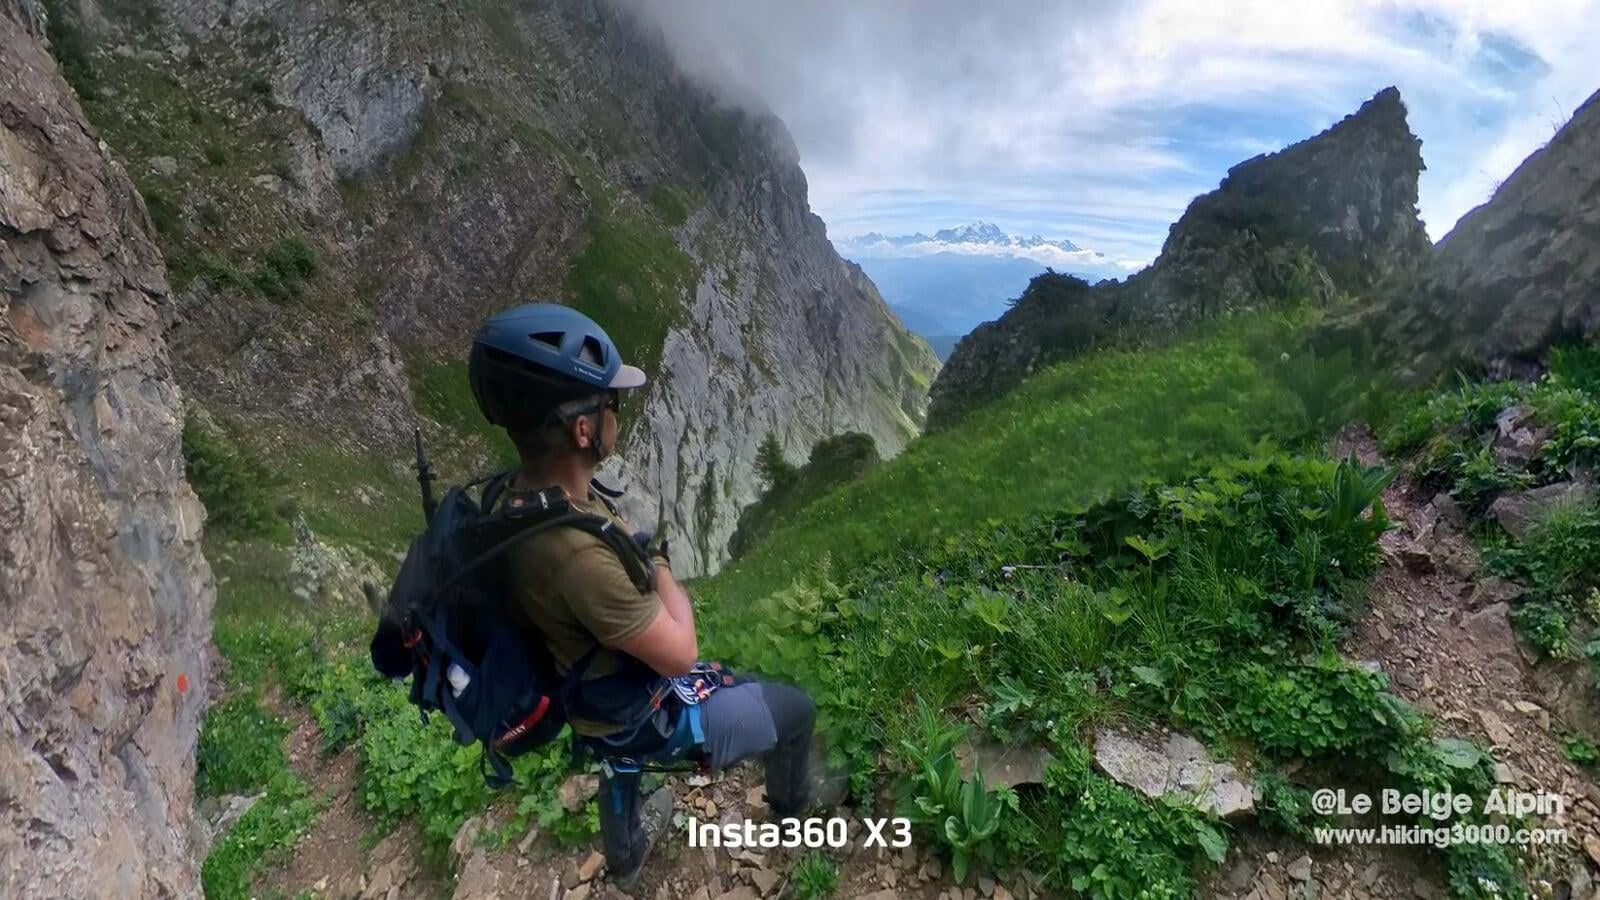
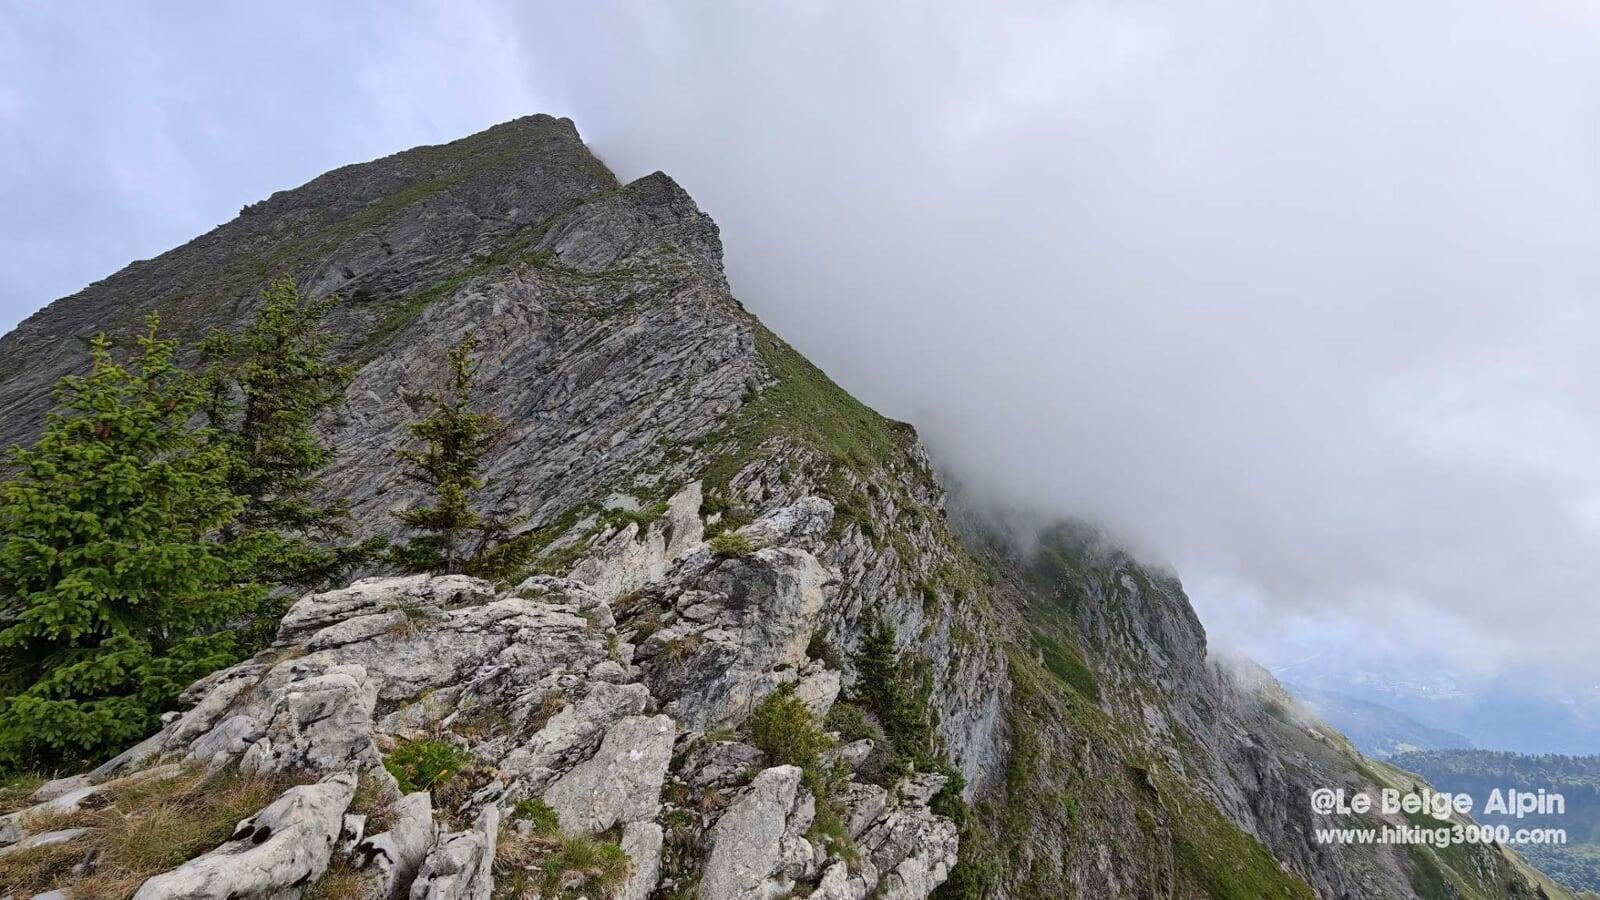
The cabled section, cumulative effort more than pure technique


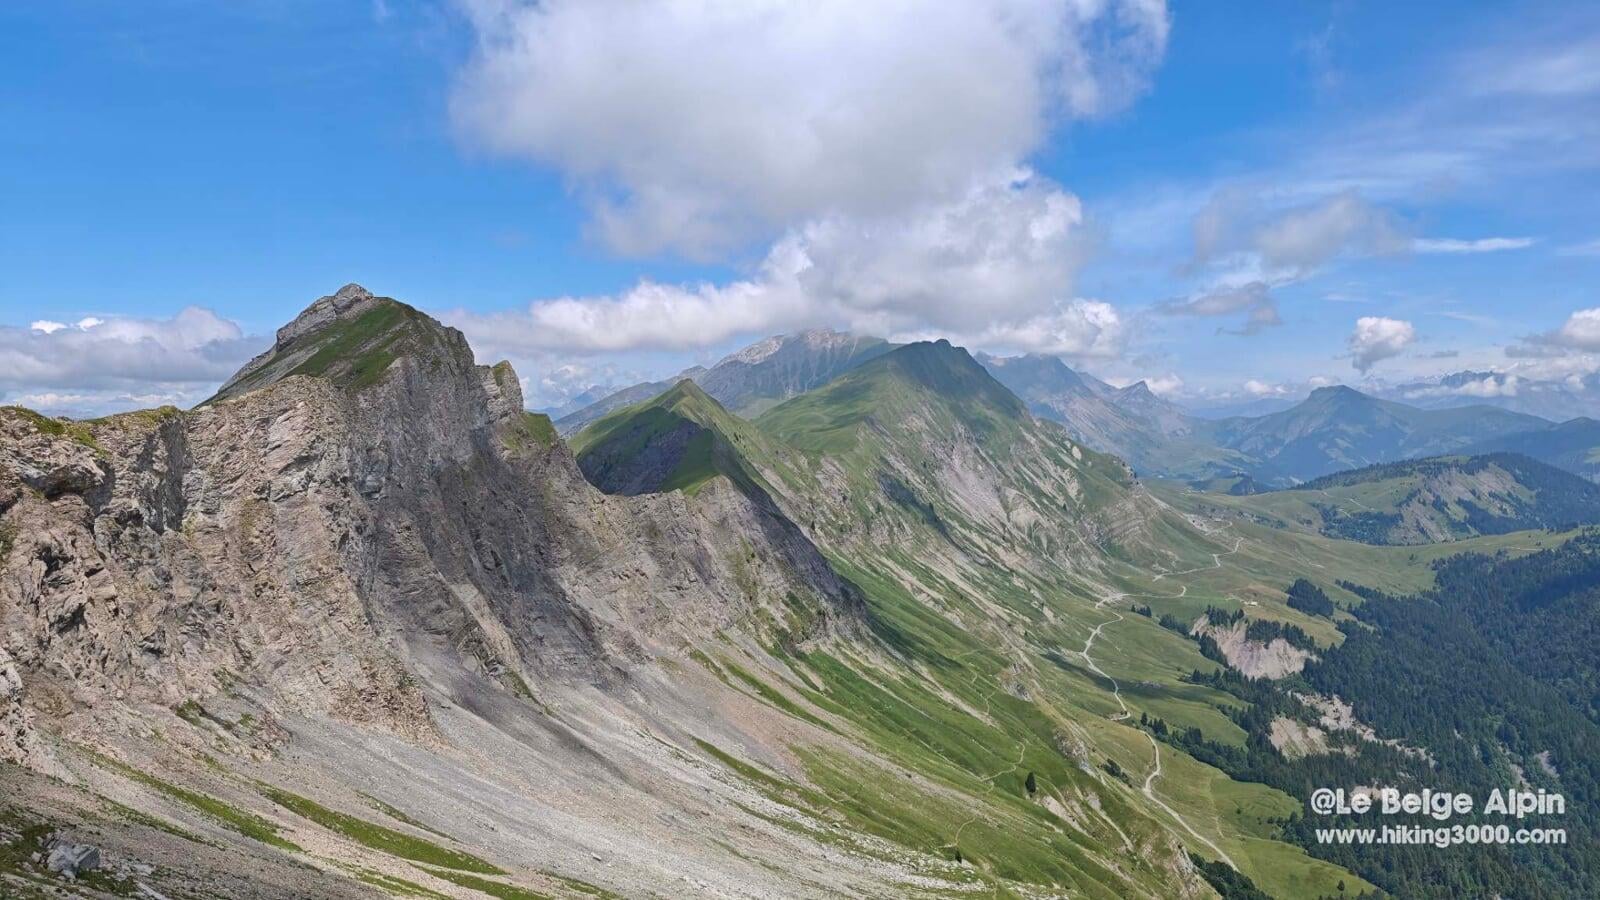
The via, overall, isn’t very technical: no overhangs, no long exposed traverses, but it climbs. And it climbs hard. You progress on ledges, steep walls and a few vertical steps. The route is clever, natural, and offers very fine sensations without ever becoming excessive.
The difficulty lies mostly in cumulative effort: more than 1073 m of elevation gain for a loop of about 11.7 km. It’s not a health walk. You need endurance, breath, and good legs to keep climbing while staying focused in the more exposed passages.
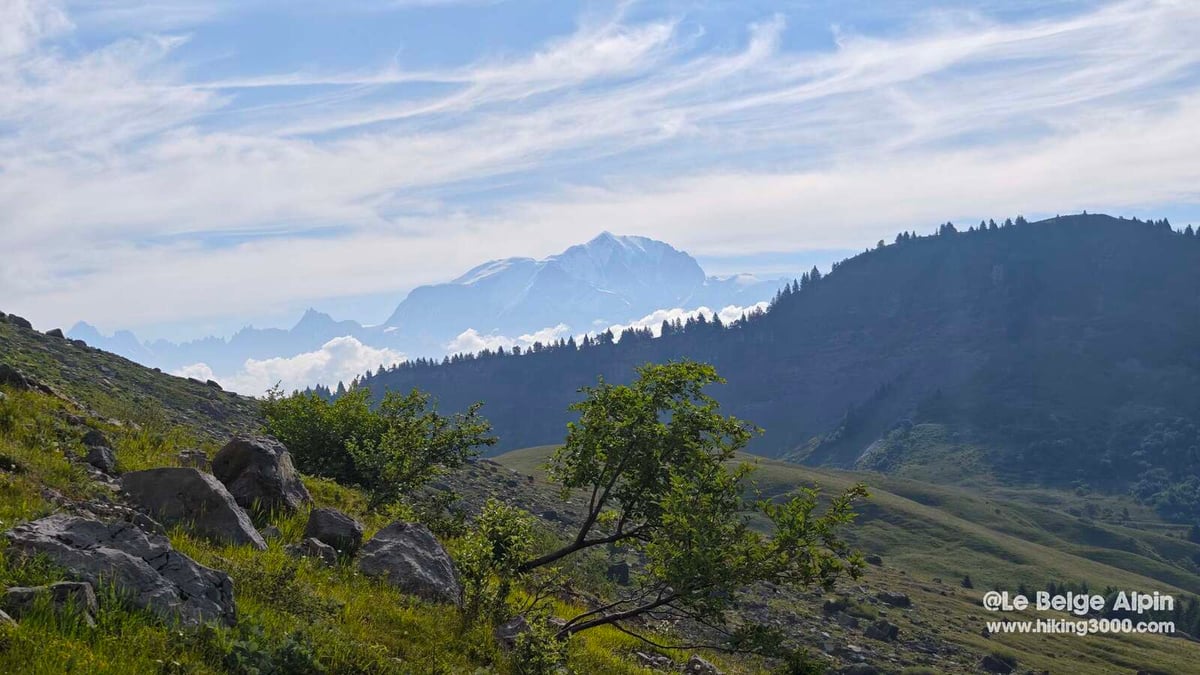
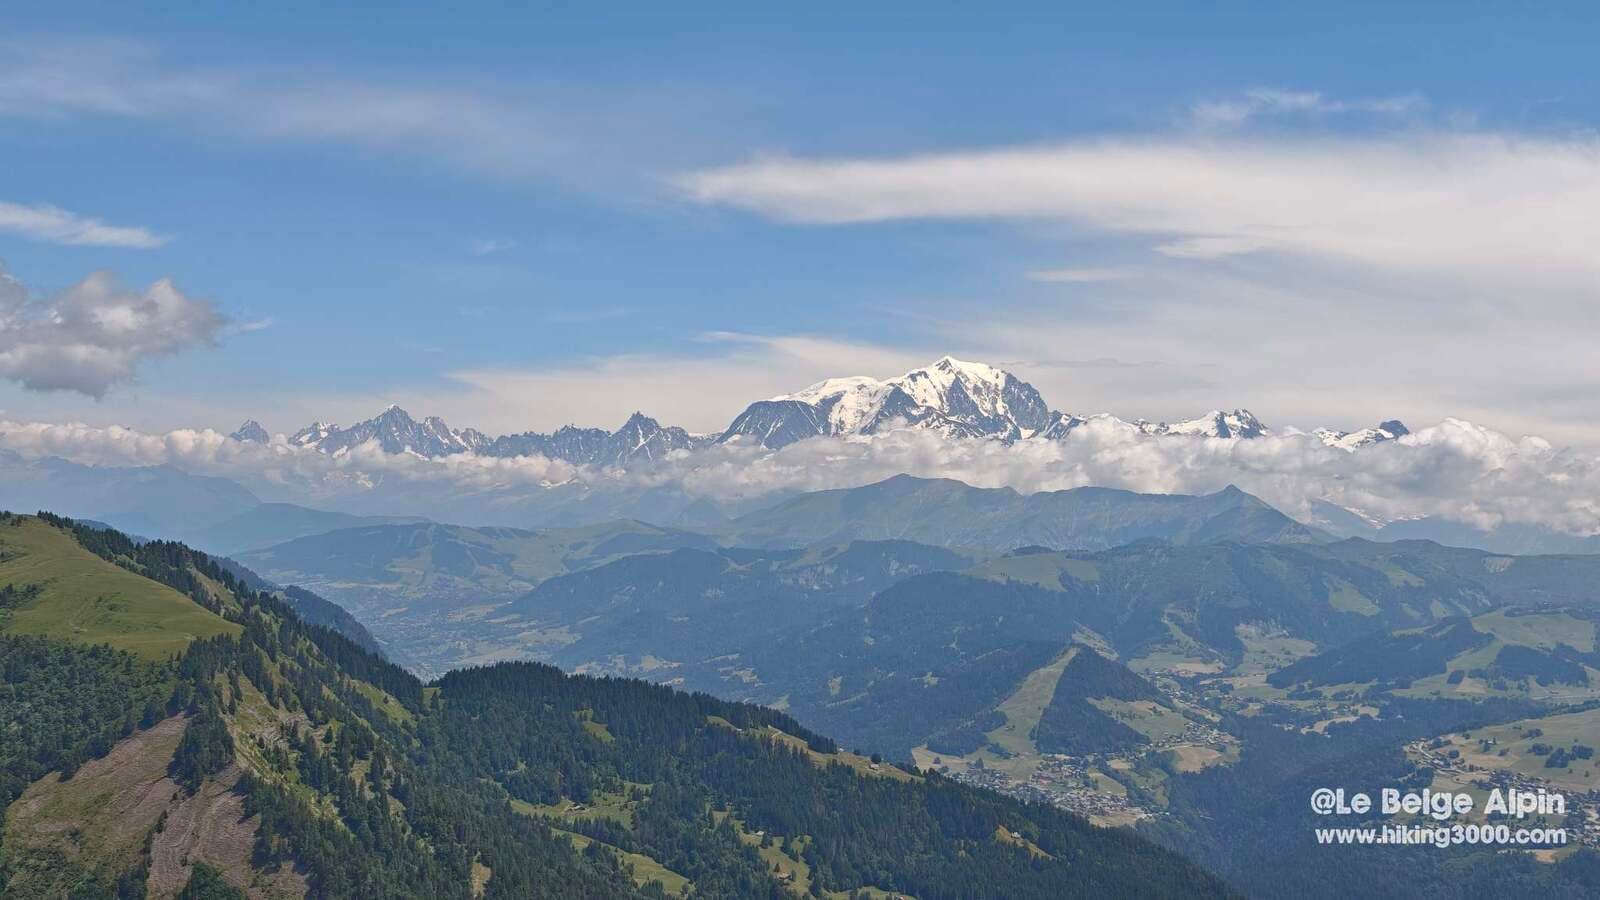
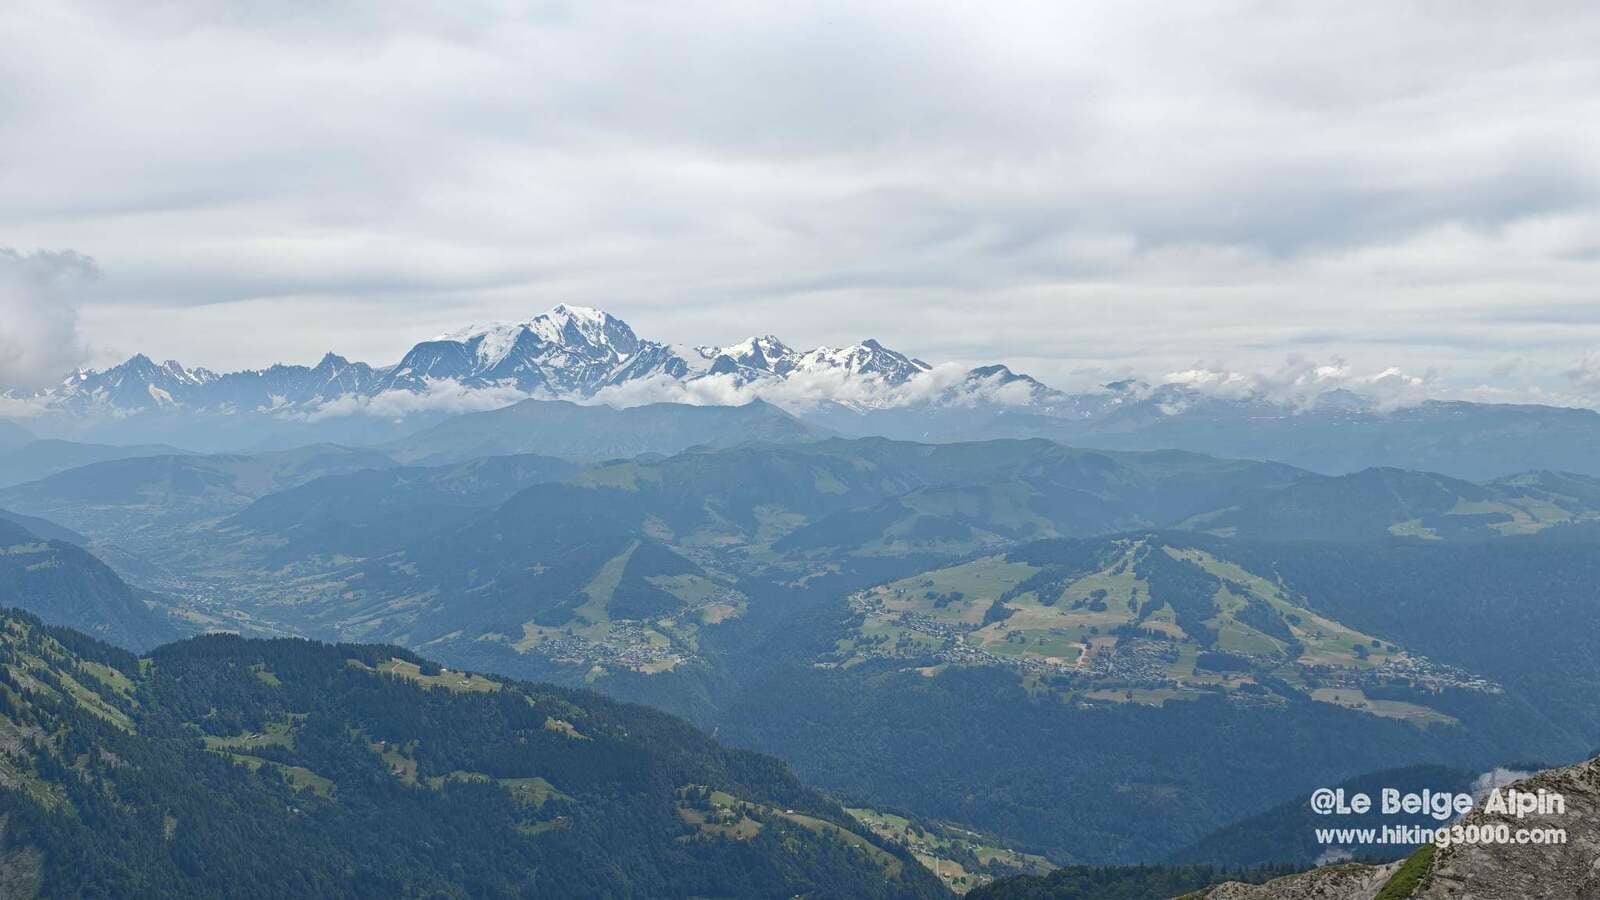
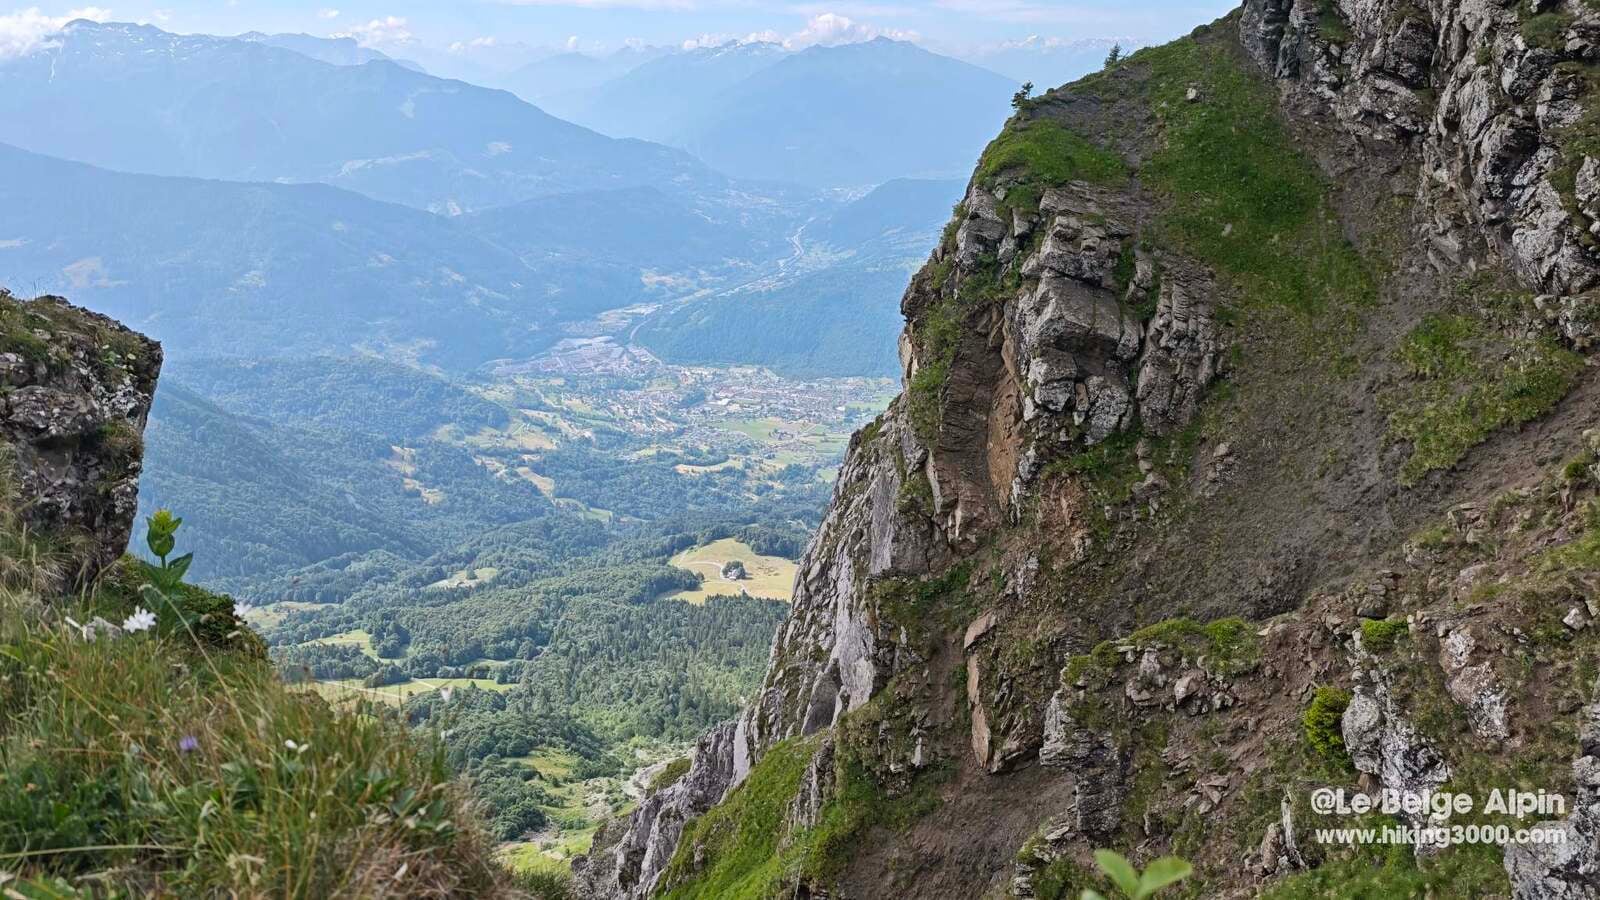
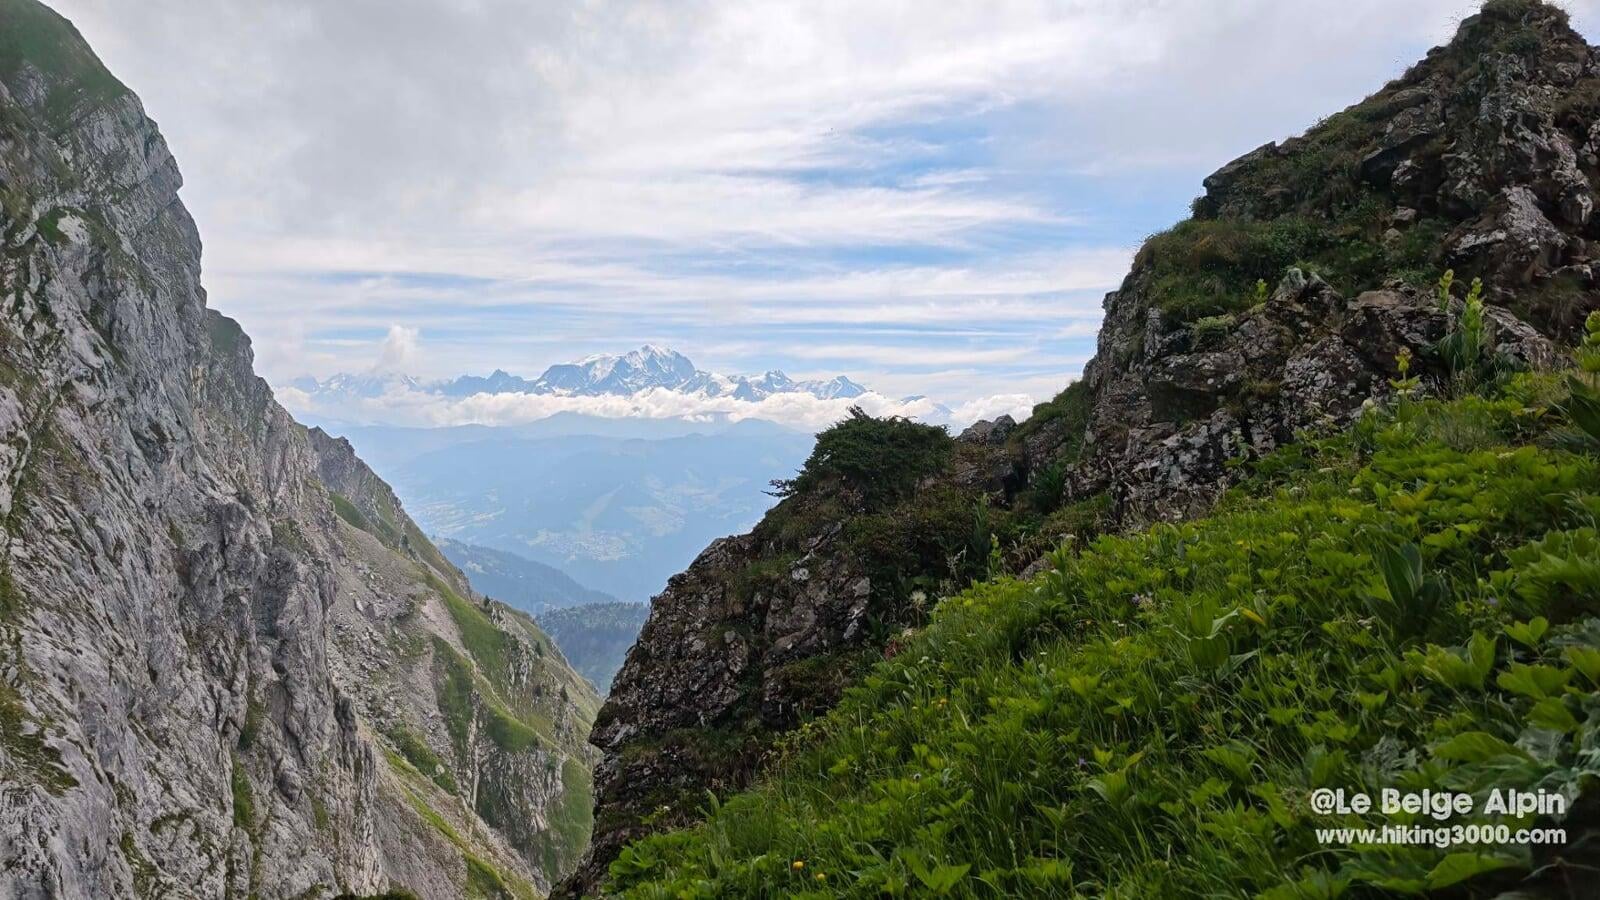
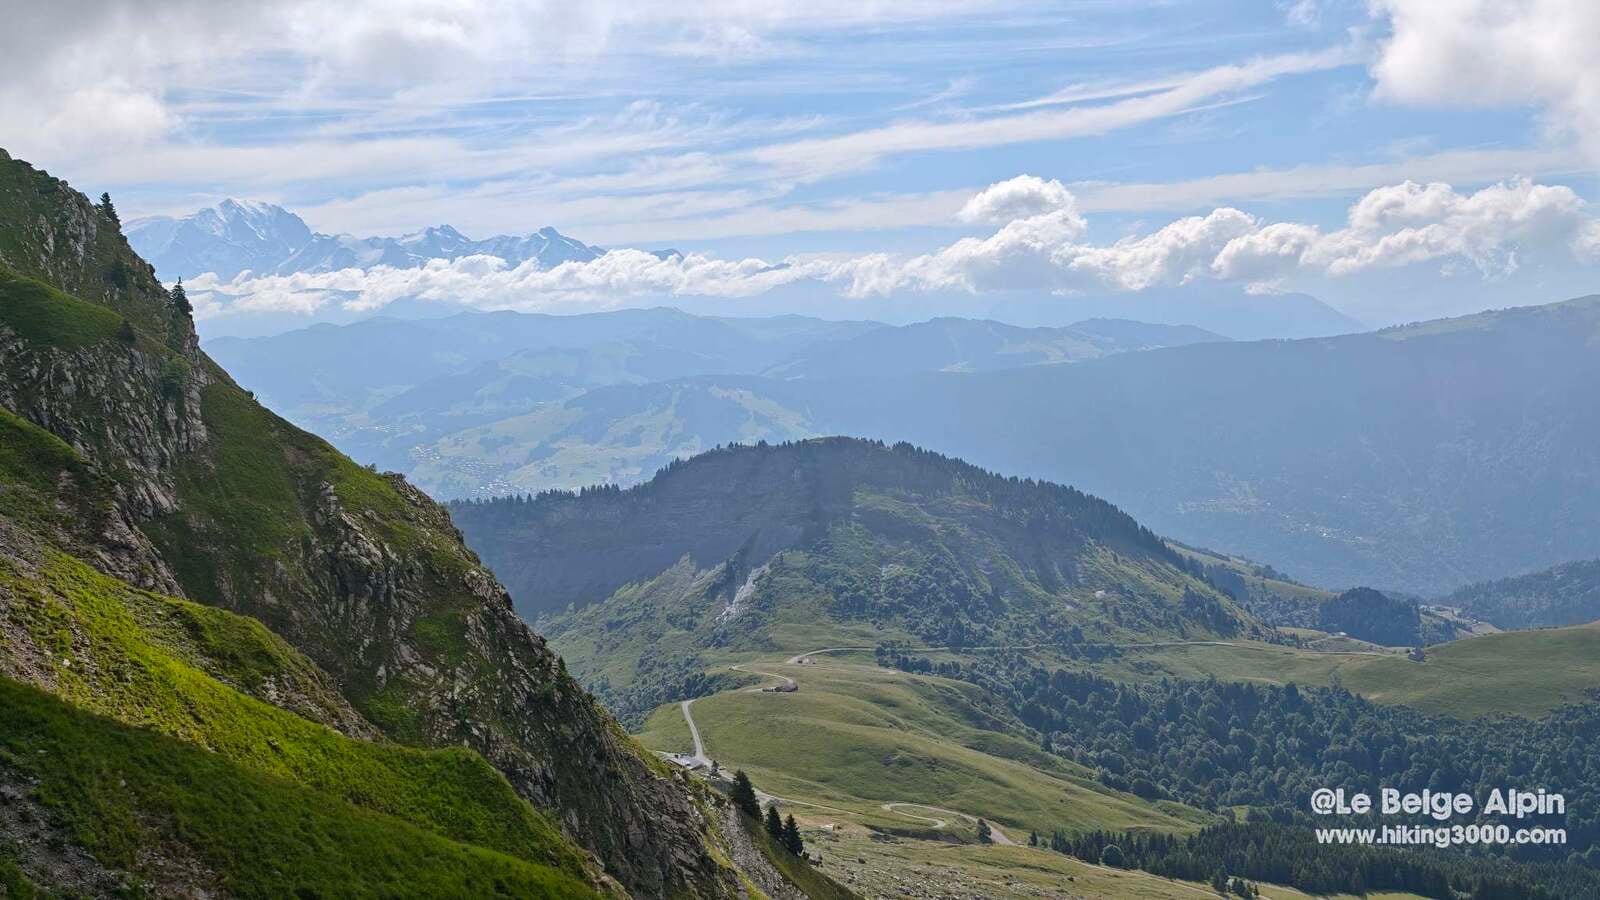
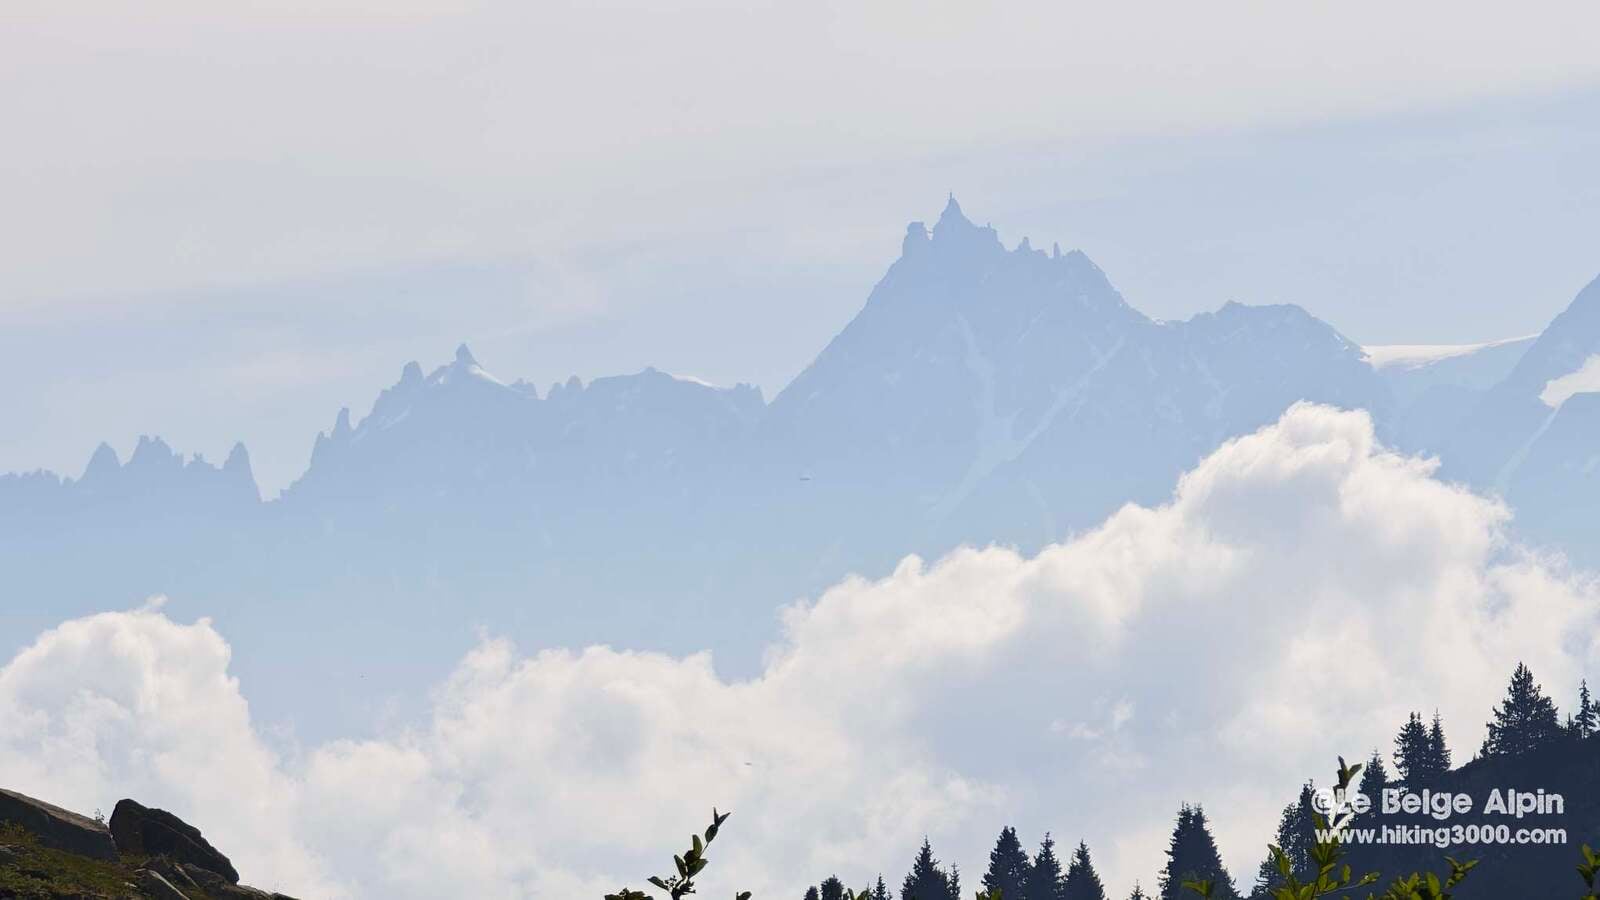
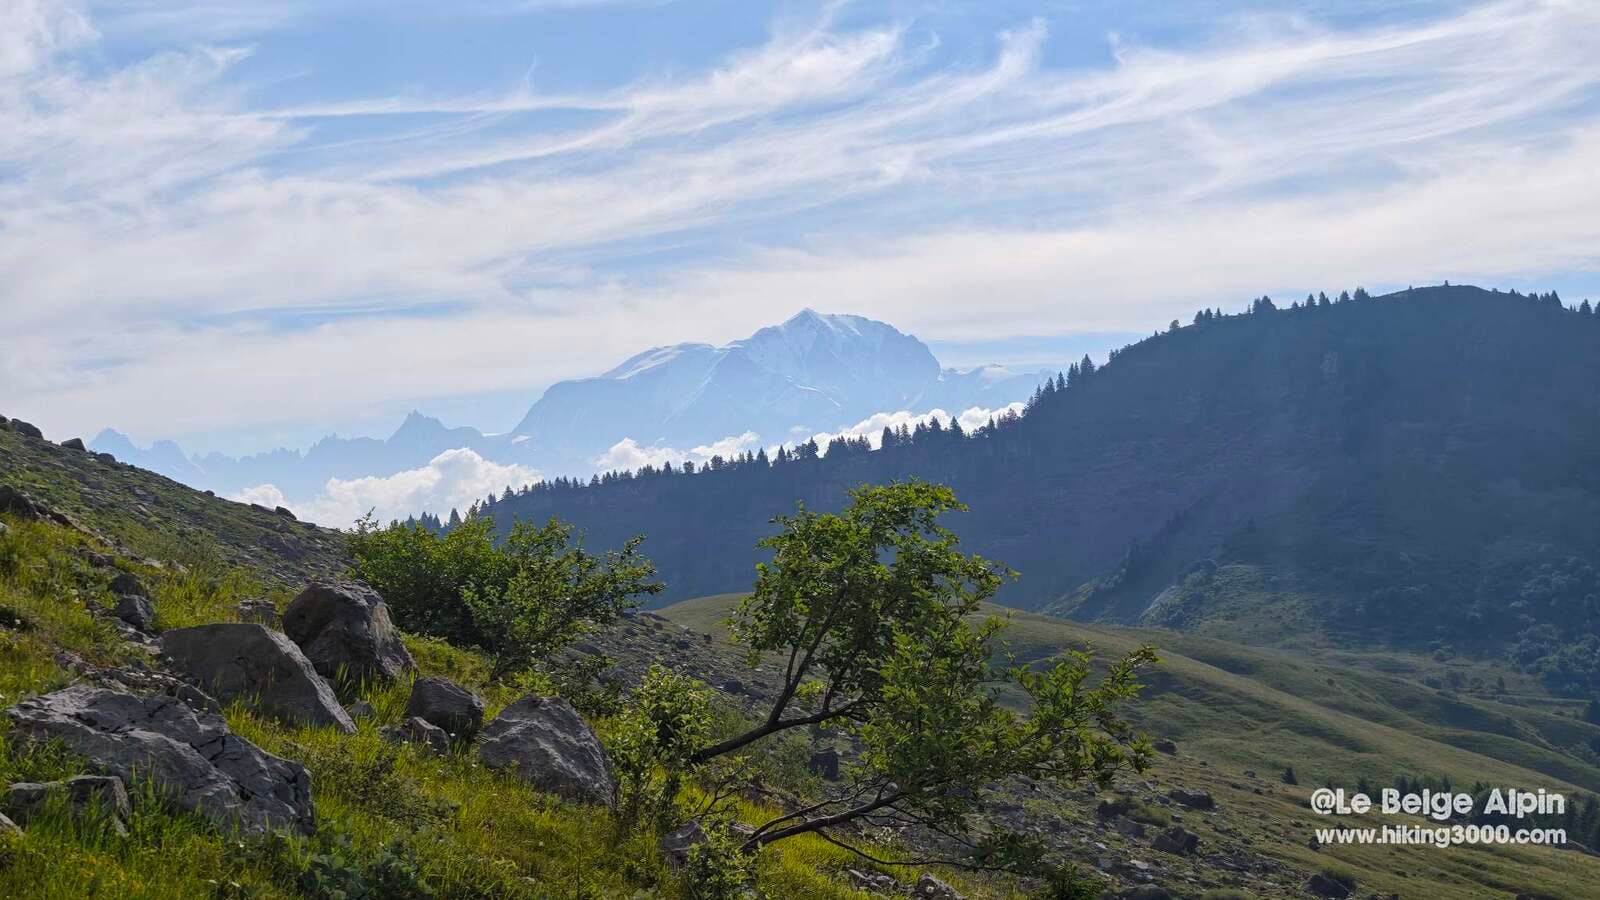
At the summit, Mont Blanc full frame
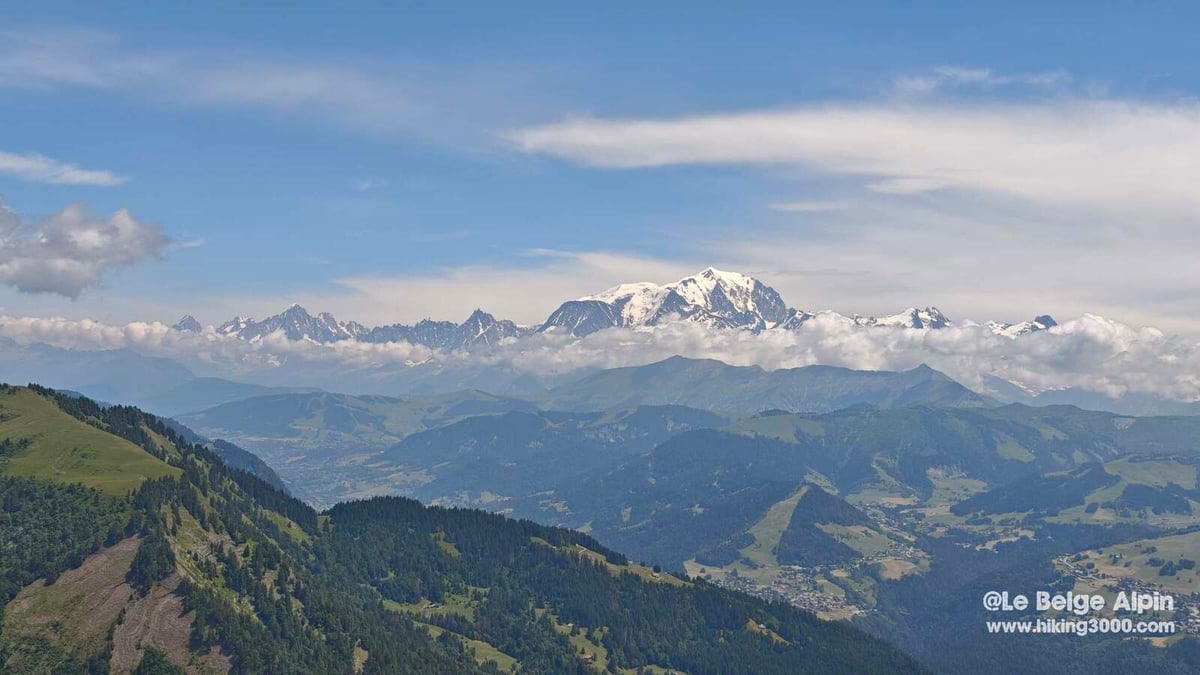
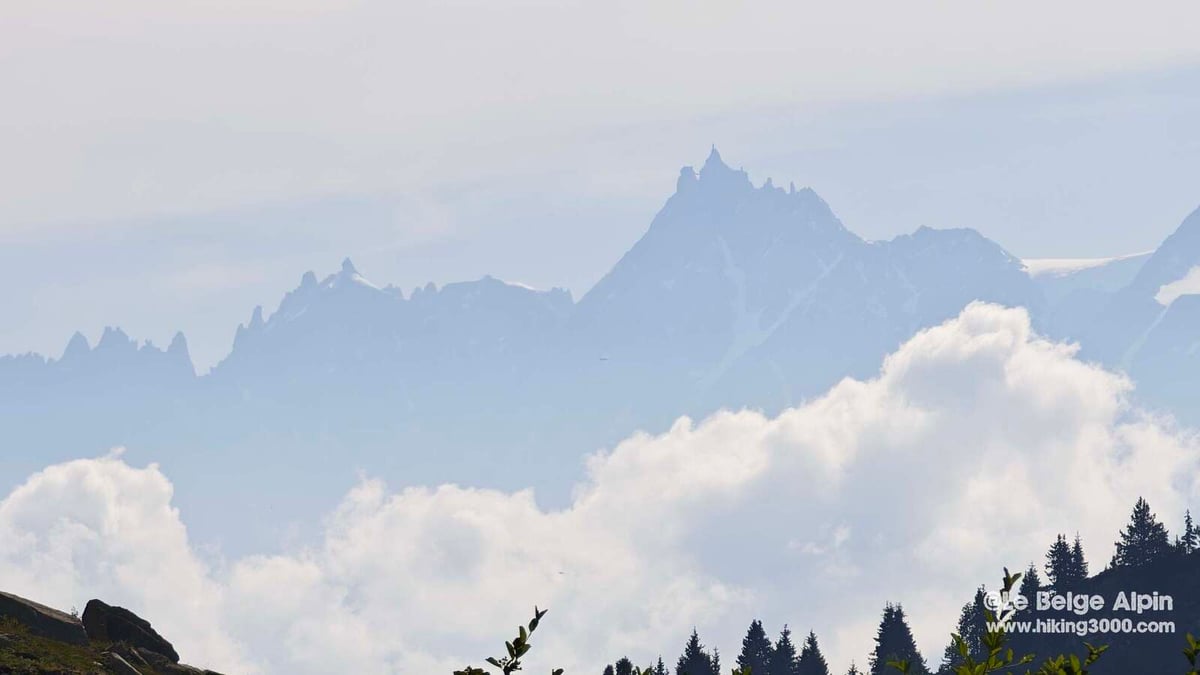
And what a panorama! In fine weather, you get a grandiose view of the whole Mont-Blanc massif, on the Chamonix side. The Aiguille Verte, the Drus, Mont-Blanc itself, the Aiguille du Midi, everything is laid out in a spectacular alpine picture. It’s a privileged viewpoint, rare, at the crossroads of physical effort and visual reward.
On June 27 when I did it again, a few clouds still played with the aiguilles, but Mont Blanc came out right at the right moment, impossible not to stop for a long while at the summit just to watch it.
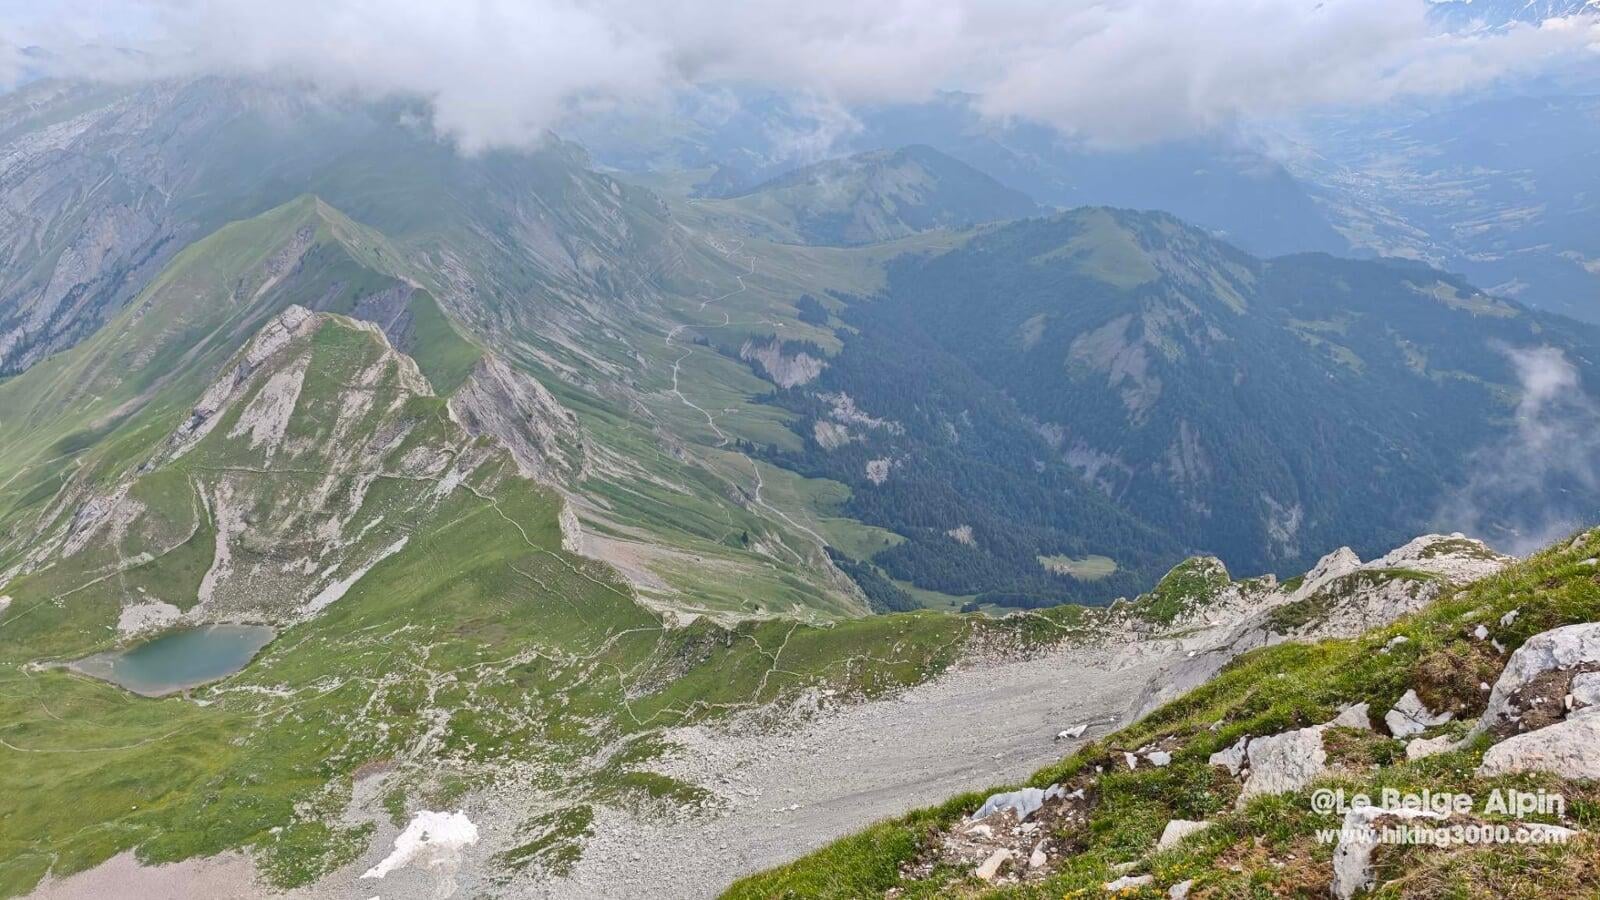
Descent via the Pas de l’Ours, stay sharp
After the summit, the descent starts towards the Pas de l’Ours, a discreet pass but one feared for its north-facing orientation. At this time of year (late June), snowfields can still be well present, covering the trails or the cables.
Quick reminder: the cables are taken down in autumn and only put back up in early summer, usually around the start of July. If in doubt, don’t go.
This section demands vigilance and concentration. You move over sometimes loose, rocky ground, and some passages are genuinely steep. You need a solid mountain foot, and to avoid letting your guard down after the satisfaction of the summit. That’s the classic mistake that can cost dearly here.
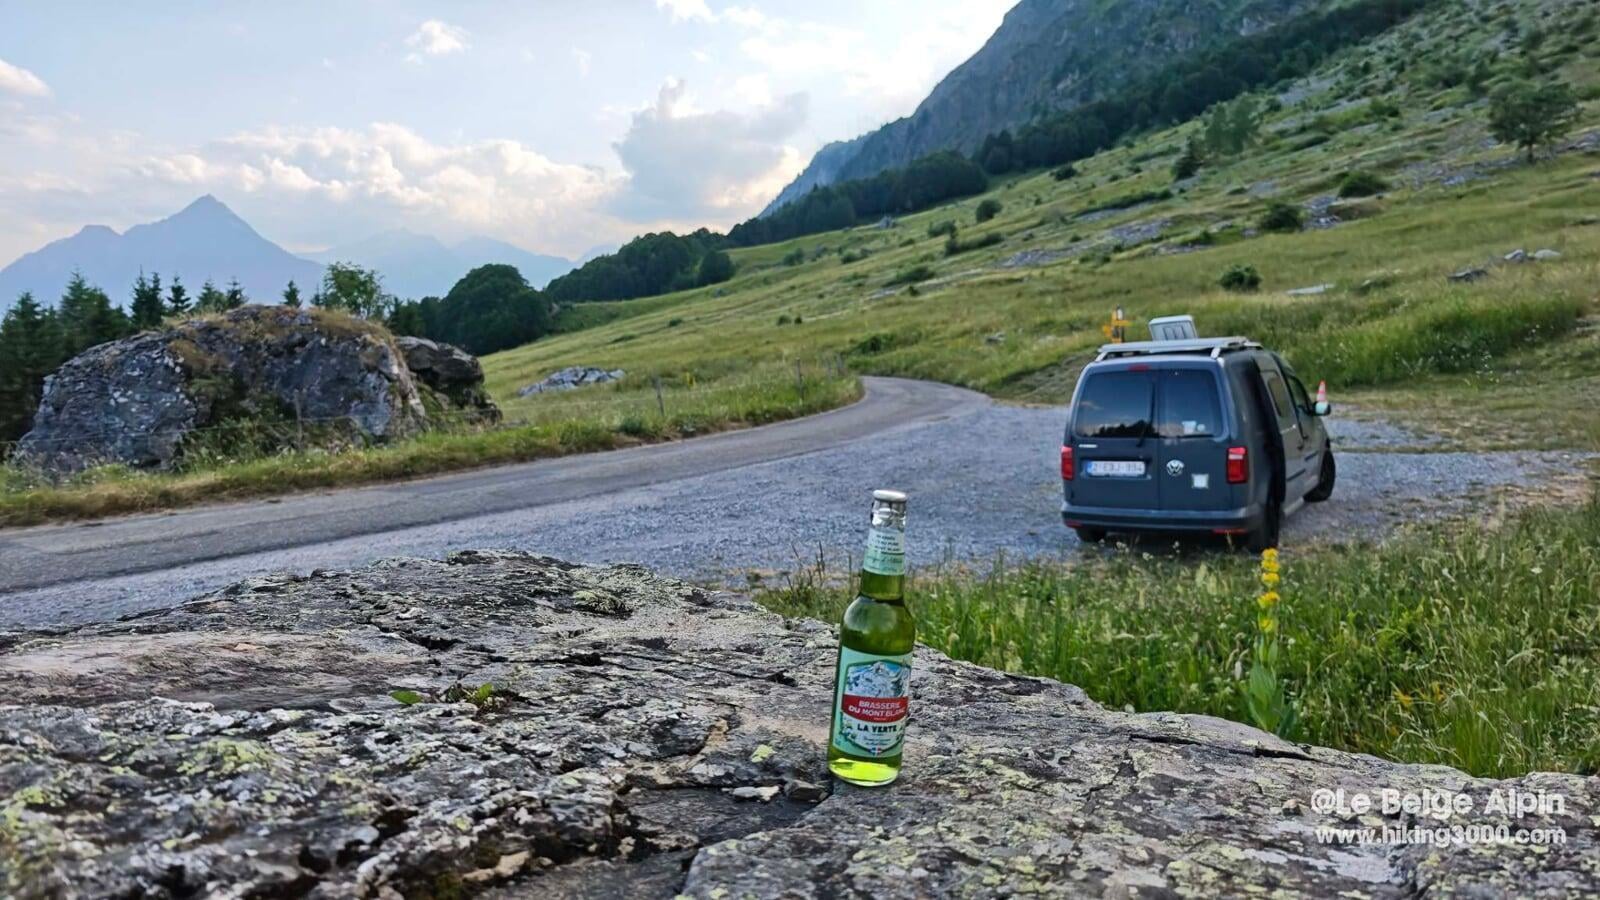
Return and a beer at the van
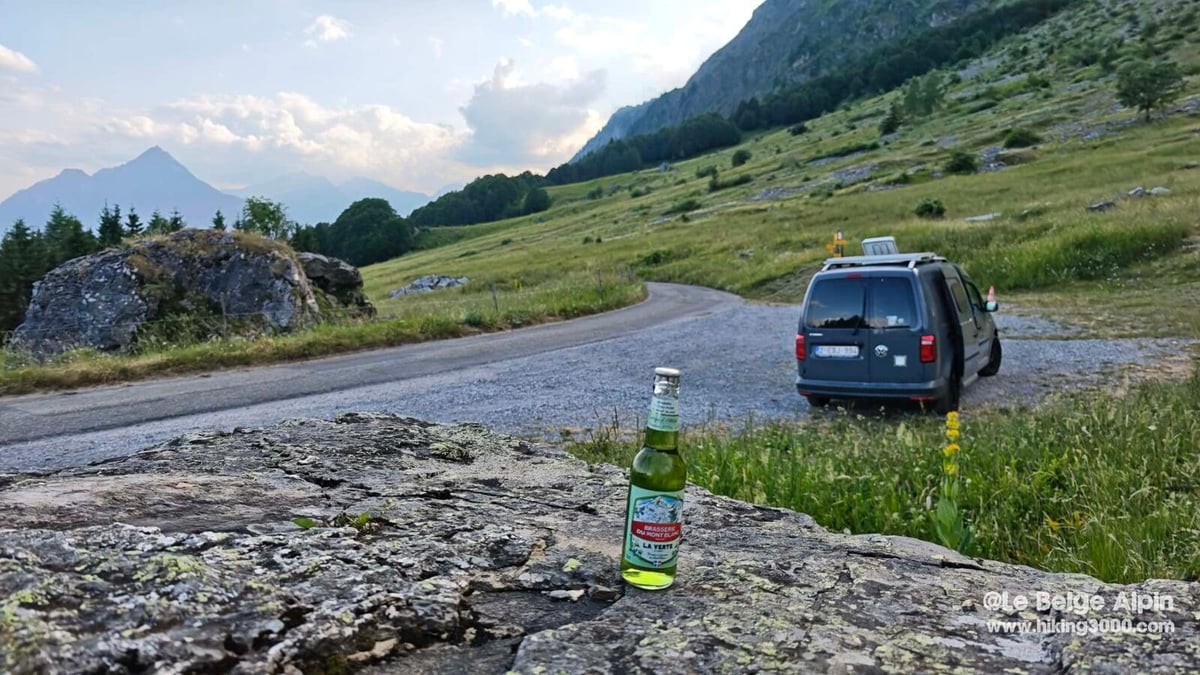
Back at the van with a Mont-Blanc beer chilled on a rock, no, it’s not staged, it’s the reward at just the right moment. A perfect loop: effort, cabled sensations, full-frame panorama, and a calm return.
Practical info
1073 m of elevation gain, 11.7 km, count 5h30 to 6h depending on your pace and time spent in the cabled part. Mandatory gear for the cabled section: harness, via ferrata lanyards (with shock absorber), helmet. Hiking shoes with good grip.
For conditions, a phone call to the Ugine Tourist Office will confirm whether the cables are in place (if you come early in the season) and the state of the Pas de l’Ours snowfields. Weekends in peak season can get a bit crowded on the route, plan to start early.
Practical info
Starting point
From Ugine or Annecy, reach Marlens then follow the road climbing up to Plan Chenay and the Charvin alpine pastures. Parking at the end of the track (1514 m). Drivable road but narrow near the end, low car possible if driven carefully.
GPX track
Import the GPS track into your watch or app (Garmin Connect, Komoot, Gaia GPS, Iphigenie...).
Sign in to downloadTourist office (current conditions)
Office de Tourisme Ugine, Val d'Arly
Place du Val d'Arly, 73400 Ugine
Garmin track
Gallery
18 photos, click to enlarge


Weather, Ugine
Conditions and forecasts for the itinerary
In the mountains, conditions change fast. A thunderstorm can become dangerous, fog disorients, residual snow slows every step. Before leaving, check the bulletins, plan a stable weather window, and when in doubt, call the tourist office or the local guides office.
Learn to read mountain weather →Questions fréquentes
When are the cables in place?
+
The cables are taken down each autumn and put back up around early July. Before that date, the cabled section cannot be tackled safely. If in doubt, call the Ugine or Val d'Arly tourist office before setting off.
What equipment is mandatory?
+
Harness, via ferrata lanyards, helmet. The level stays moderate (no overhangs, no long exposed traverses), but a slip without a lanyard can have serious consequences. Also plan for crampons and an ice axe in late June if the Pas de l'Ours still holds snow.
Is it more a via ferrata or a hike?
+
It's a hybrid. The approach and descent are difficult hiking, but the central section is a proper via ferrata, with continuous cables and drops you can feel. You need both profiles: the legs for 1073 m of elevation gain, and harness technique for the cabled part.